 Chris
ChrisWanted to share what apps & services I'm currently self-hosting on my small Linode VPS
TLDR;
Using docker-compose, nginx and CloudFlare
Everything runs smoothly on a "Nanode" (Linode's version of a 5$/month VPS with 1GB RAM, 25GB SSD, 1 CPU)
Tools used
My setup consists of a lovely symbiosis between docker-compose, nginx and CloudFlare.
CloudFlare serves the SSL certificates for the subdomains I set up for the various services.
To give you an idea of the subdomains I set up
comments.cri.devrss.cri.dev- ...
nginx serves as a reverse proxy to dispatch requests to the correct service.
docker/docker-compose to keep the various services running and isolated from each other (e.g. multiple services could use postgres or redis, but are shielded and managed separately).
Read more below how to set it up yourself.
Folder structure
This is how I organized the various services in folders, with the own docker-compose.yml and eventual config / source files:
x@server:~$ tree . -L 2
.
├── commento
│   └── docker-compose.yml
├── linkding
│   ├── data
│   └── docker-compose.yml
├── miniflux
│   └── docker-compose.yml
├── planka
│   └── docker-compose.yml
├── pleroma-docker
│   └── ...other source files...
│   ├── config.exs
│   ├── data
│   ├── docker-compose.yml
│   └── Dockerfile
├── snapdrop
│   ├── config
│   └── docker-compose.yml
├── umami
│   └── docker-compose.yml
└── wireguard
    ├── config
    └── docker-compose.yml
As you can see, the only "exception" is pleroma-docker where the source files are needed and an additional config.exs to configure it correctly.
Below I want to go in deeper detail how to set up each service individually.
DNS
For all services below, simply create an individual DNS subdomain on CloudFlare (or where your domain is managed).
Create an A record that points to your servers IP.
CloudFlare takes care of your certificates, that's why I recommend it.
You could also generate the certificates yourself with Letsencrypt.
Apps & services
WireGuard VPN
WireGuard is my go-to VPN when I need to set up one on my own, for personal use.
To create my personal VPN I'm using the following docker-compose.yml:
version: "2.1"
services:
  wireguard:
  image: linuxserver/wireguard
    container_name: wireguard
    cap_add:
      - NET_ADMIN
      - SYS_MODULE
    environment:
      - PUID=1000
      - PGID=1000
      - TZ=Europe/Rome
      - SERVERPORT=51820 # optional
      - PEERS=5 # optional, this will create 5 configurations
    volumes:
      - /home/cf/wireguard/config:/config
      - /lib/modules:/lib/modules
    ports:
      - 51820:51820/udp
    sysctls:
      - net.ipv4.conf.all.src_valid_mark=1
    restart: always
Once you placed this docker-compose.yml in the folder wireguard:
cd wireguard
docker-compose up -d
Eventually check the logs with docker logs -f wireguard to see if everything seems fine.
Now you can either show a QR code to connect to the VPN through a mobile phone, or scp the configuration file to your PC:
To connect from a mobile device by scanning the QR code for the desired config, run
docker exec -it wireguard /app/show-peer 1
You can also scp the config files located under wireguard/config/peer*/peer*.conf to set up your PC
Place the config files under your local /etc/wireguard/ folder and manage the connections with wg-quick.
For more info check out this blog post about "5$/month Self Hosted VPN with WireGuard"
Miniflux RSS
Miniflux has become my go-to RSS reader, that I can visit from my phone or PC seamlessly on the web.
For Miniflux I am using this docker-compose.yml:
version: '3.3'
services:
  miniflux:
  image: miniflux/miniflux:latest
    container_name: miniflux
    restart: always
    ports:
      - "127.0.0.1:3000:8080"
    depends_on:
      - db
    environment:
      - DATABASE_URL=postgres://[REDACTED_POSTGRES_USER]:[REDACTED_POSTGRES_PASSWORD]@db/miniflux?sslmode=disable
      - RUN_MIGRATIONS=1
      - CREATE_ADMIN=1
      - ADMIN_USERNAME=[REDACTED_ADMIN_USERNAME]
      - ADMIN_PASSWORD=[REDACTED_ADMIN_PASSWORD]
      - POLLING_FREQUENCY=10
      - "BASE_URL=https://your.url"
      - "HTTPS=on"
      - "DEBUG=on"
  db:
  image: postgres:latest
    restart: always
    container_name: postgres
    environment:
      - POSTGRES_USER=[REDACTED_POSTGRES_USER]
      - POSTGRES_PASSWORD=[REDACTED_POSTGRES_PASSWORD]
    volumes:
      - miniflux-db:/var/lib/postgresql/data
volumes:
  miniflux-db:
Set your own ADMIN_USERNAME and ADMIN_PASSWORD to log in on the Web UI.
Change BASE_URL, POSTGRES_USER and POSTGRES_PASSWORD.
Run docker-compose up -d in the miniflux directory, and you have your own RSS reader.
The service is exposed on port 3000.
Check out the nginx section to set up your reverse proxy for Miniflux.
Planka
A dead-simple Trello-like Kanban board.
My docker-compose.yml is based on the official one
Simply copy it in the planka folder, follow the instructions and run docker-compose up -d
Check out the nginx section to set up your reverse proxy for Planka.
Linkding
Similarly for Linkding, I grabbed the official docker-compose.yml and placed it in the folder linkding:
version: '3'

services:
  linkding:
    container_name: "${LD_CONTAINER_NAME:-linkding}"
  image: sissbruecker/linkding:latest
    ports:
      - "${LD_HOST_PORT:-9090}:9090"
    volumes:
      - "${LD_HOST_DATA_DIR:-./data}:/etc/linkding/data"
    restart: unless-stopped
The service is listening on port 9090
Check out the nginx section to set up your reverse proxy for Linkding.
The default username and password are [email protected] / demo.
Change them on your first login through the Web UI.
Commento comments
Also here there is an official docker-compose.yml:
version: '3'

services:
  server:
  image: registry.gitlab.com/commento/commento
    restart: always
    ports:
      - 127.0.0.1:8081:8080
    environment:
      COMMENTO_ORIGIN: https://comments.cri.dev
      COMMENTO_PORT: 8080
      COMMENTO_POSTGRES: postgres://postgres:[REDACTED]@db:5432/commento?sslmode=disable
      COMMENTO_FORBID_NEW_OWNERS: "true"
      COMMENTO_GZIP_STATIC: "true"
      COMMENTO_SMTP_HOST: ...
      COMMENTO_SMTP_PORT: ...
      COMMENTO_SMTP_USERNAME: ...
      COMMENTO_SMTP_PASSWORD: ...
      COMMENTO_SMTP_FROM_ADDRESS: ...
    depends_on:
      - db
    networks:
      - db_network
  db:
  image: postgres
    restart: always
    environment:
      POSTGRES_DB: commento
      POSTGRES_USER: postgres
      POSTGRES_PASSWORD: ...
    networks:
      - db_network
    volumes:
      - postgres_data_volume:/var/lib/postgresql/data

networks:
  db_network:

volumes:
  postgres_data_volume:
The service runs on port 8081
Check out the nginx section to set up your reverse proxy for Commento.
Umami
Using the official docker-compose.yml
The pro of self-hosting your website analytics software is that you get an real sense of your website visitors.
I noticed that most adblockers work by domain, thus hosting the service under your domain you likely don't get blocked.
Snapdrop
Snapdrop provides local file sharing in your browser. Inspired by Apple's Airdrop.
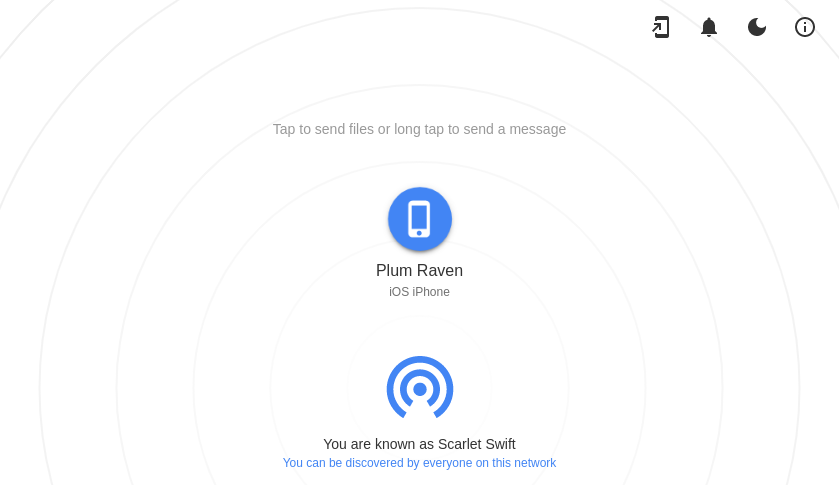
On the same home network, I can share files between devices easily.
Works by using WebRTC for transfer and WebSockets for signalling, and can be installed as a PWA.
The source code is also quite nice.
To get everything up and running I'm using the linuxserver/snapdrop Docker image.
My docker-compose.yml looks like this:
---
version: "2.1"
services:
  snapdrop:
  image: ghcr.io/linuxserver/snapdrop
    container_name: snapdrop
    environment:
      - PUID=1000
      - PGID=1000
      - TZ=Europe/London
    volumes:
      - ./config:/config
    ports:
      - 127.0.0.1:3002:80
    restart: unless-stopped
In the nginx section you'll find more info on how to set up your reverse proxy for Snapdrop.
nginx
I am using nginx as a reverse proxy to forward requests to the correct backend.
Each service exposes its port locally, meaning on the interface 127.0.0.1 without exposing the port on the internet.
All services are served by nginx on port 80.
With CloudFlare I set up various subdomains to point to the IP address of my server.
Here is the configuration for miniflux for example, which is set up to listen to the port 3000:
Put this file under /etc/nginx/sites-available/miniflux
upstream miniflux {
    server 127.0.0.1:[SERVICE_PORT] max_fails=5 fail_timeout=60s;
}

server {
    server_name    [YOUR_DOMAIN];

    listen         80;
    listen         [::]:80;

    gzip_vary on;
    gzip_proxied any;
    gzip_comp_level 6;
    gzip_buffers 16 8k;
    gzip_http_version 1.1;
    gzip_types text/plain text/css application/json application/javascript text/xml application/xml application/xml+rss text/javascript application/activity+json application/atom+xml;

    client_max_body_size 16m;
    ignore_invalid_headers off;

    proxy_http_version 1.1;
    proxy_set_header Upgrade $http_upgrade;
    proxy_set_header Connection "upgrade";
    proxy_set_header Host $http_host;
    proxy_set_header X-Forwarded-For $proxy_add_x_forwarded_for;

    location / {
        proxy_pass http://miniflux;
    }
}
The only changes you need to make to set this up for the other services are
- set the correct port of the service (under the
upstreamsection) - specify the
server_nameto match one you set up on CloudFlare
Now create a symbolic links to "enable" the site configuration:
sudo ln -s /etc/nginx/sites-available/miniflux /etc/nginx/sites-enabled/miniflux
and reload your nginx service
sudo systemctl reload nginx
Next steps
I want to experiment is to make the services only accessible through the VPN network, so that they're shielded from the internet.
Another approach could be to self-host them on a Raspberry Pi.
Although, I had some trouble finding ARM specific build for some images. You can still try to build them from source by yourself.
Conclusions
In the above list it was omitted, but of course you need to harden your server, limit root/password access and correctly set up your firewall.
There is an excellent guide on Linode's docs page
The set of services outlined above suits my needs extremely well, plus the cost of managing them is super low (5$ / month).
On GitHub there is an exhaustive list of services that you can easily self-host.
Note: When you are self-hosting you will inevitably run into the following issues that you need to take extra care for:
- security
- data backup / data loss
- updates
So it's not all sunshine and roses.